CampusConnect User Guide
Empowering connections in the NUS community is just a few keystrokes away!
CampusConnect is a desktop application built for NUS students living on campus to help them stay organised, stay connected, and make the on-campus experience at NUS stress-free. It is optimised for use via Command Line Interface (CLI) while benefiting from a Graphical User Interface (GUI).
Here is an overview of how CampusConnect can enhance your campus experience:
- Store and edit contact profiles of your friends
- Receive timely notifications to celebrate your friends' birthdays
- Tracks payments between you and your friends
Using this Guide
This user guide shows you how to get started with using CampusConnect -- it has easy-to-understand explanations and examples to help you grasp its various features.
Who is this guide for?
Our guide is catered to CampusConnect users of all experiences! Here's a quick overview of who this guide is for, and how you can best use the guide:
| If you are... | You should... |
|---|---|
| New to CampusConnect | Read the Quick Start below! |
| An existing user | Skip to the Command Summary for a quick reference, or read through our Features for a deeper look at each feature! |
| Interested in comprehensive technical details | Read our Developer Guide, which is separate from this User Guide! |
Visual Components
Our guide uses visual components to highlight key information for your convenience. Here's a quick overview of what each component means:
- Examples
This light blue box with the magnifying glass icon provides you with command examples that will show you how a feature works.
- Command Syntax Tables
- Warnings / Error Cases
- Tips
Table of Contents
- Quick Start
- Interface Overview
- Features
- FAQ
- Command summary
Quick Start
Ensure you have Java
11or above installed in your Computer.Download the latest
CampusConnect.jarfrom here.Copy the file to the folder you want to use as the home folder for the application.
Open a command terminal,
cdinto the folder you put the jar file in, and use thejava -jar CampusConnect.jarcommand to run the application.
CampusConnect will appear shortly, as shown in the image below. Note how CampusConnect contains some sample data.
You can now start typing some command into the command box and press Enter to execute it. e.g. typing
helpand pressing Enter will open the help window.To get you familiarised with our application, here are some example commands you can try:
list: Lists all of your contacts in CampusConnect.add n/John Doe p/98765432 e/johnd@example.com a/John street, block 123, #01-01: Adds a contact namedJohn Doeto CampusConnect.add n/Jane Doe p/98765433 e/janed@example.com a/Jane street, block 123, #01-01 t/floorball t/suitemate: Adds a contact namedJane Doeto CampusConnect who is tagged with thefloorballandsuitematetags.find n/Doe: Finds all contacts who have "Doe" in their name.exit: Exits the app.
Refer to the Features below for details of each command.
Interface Overview
CampusConnect's Graphical User Interface (GUI) allows users to access contacts through an intuitive display with seamless interaction. Here is an overview of the main elements of the interface you should be familiar with to make the most out of CampusConnect.

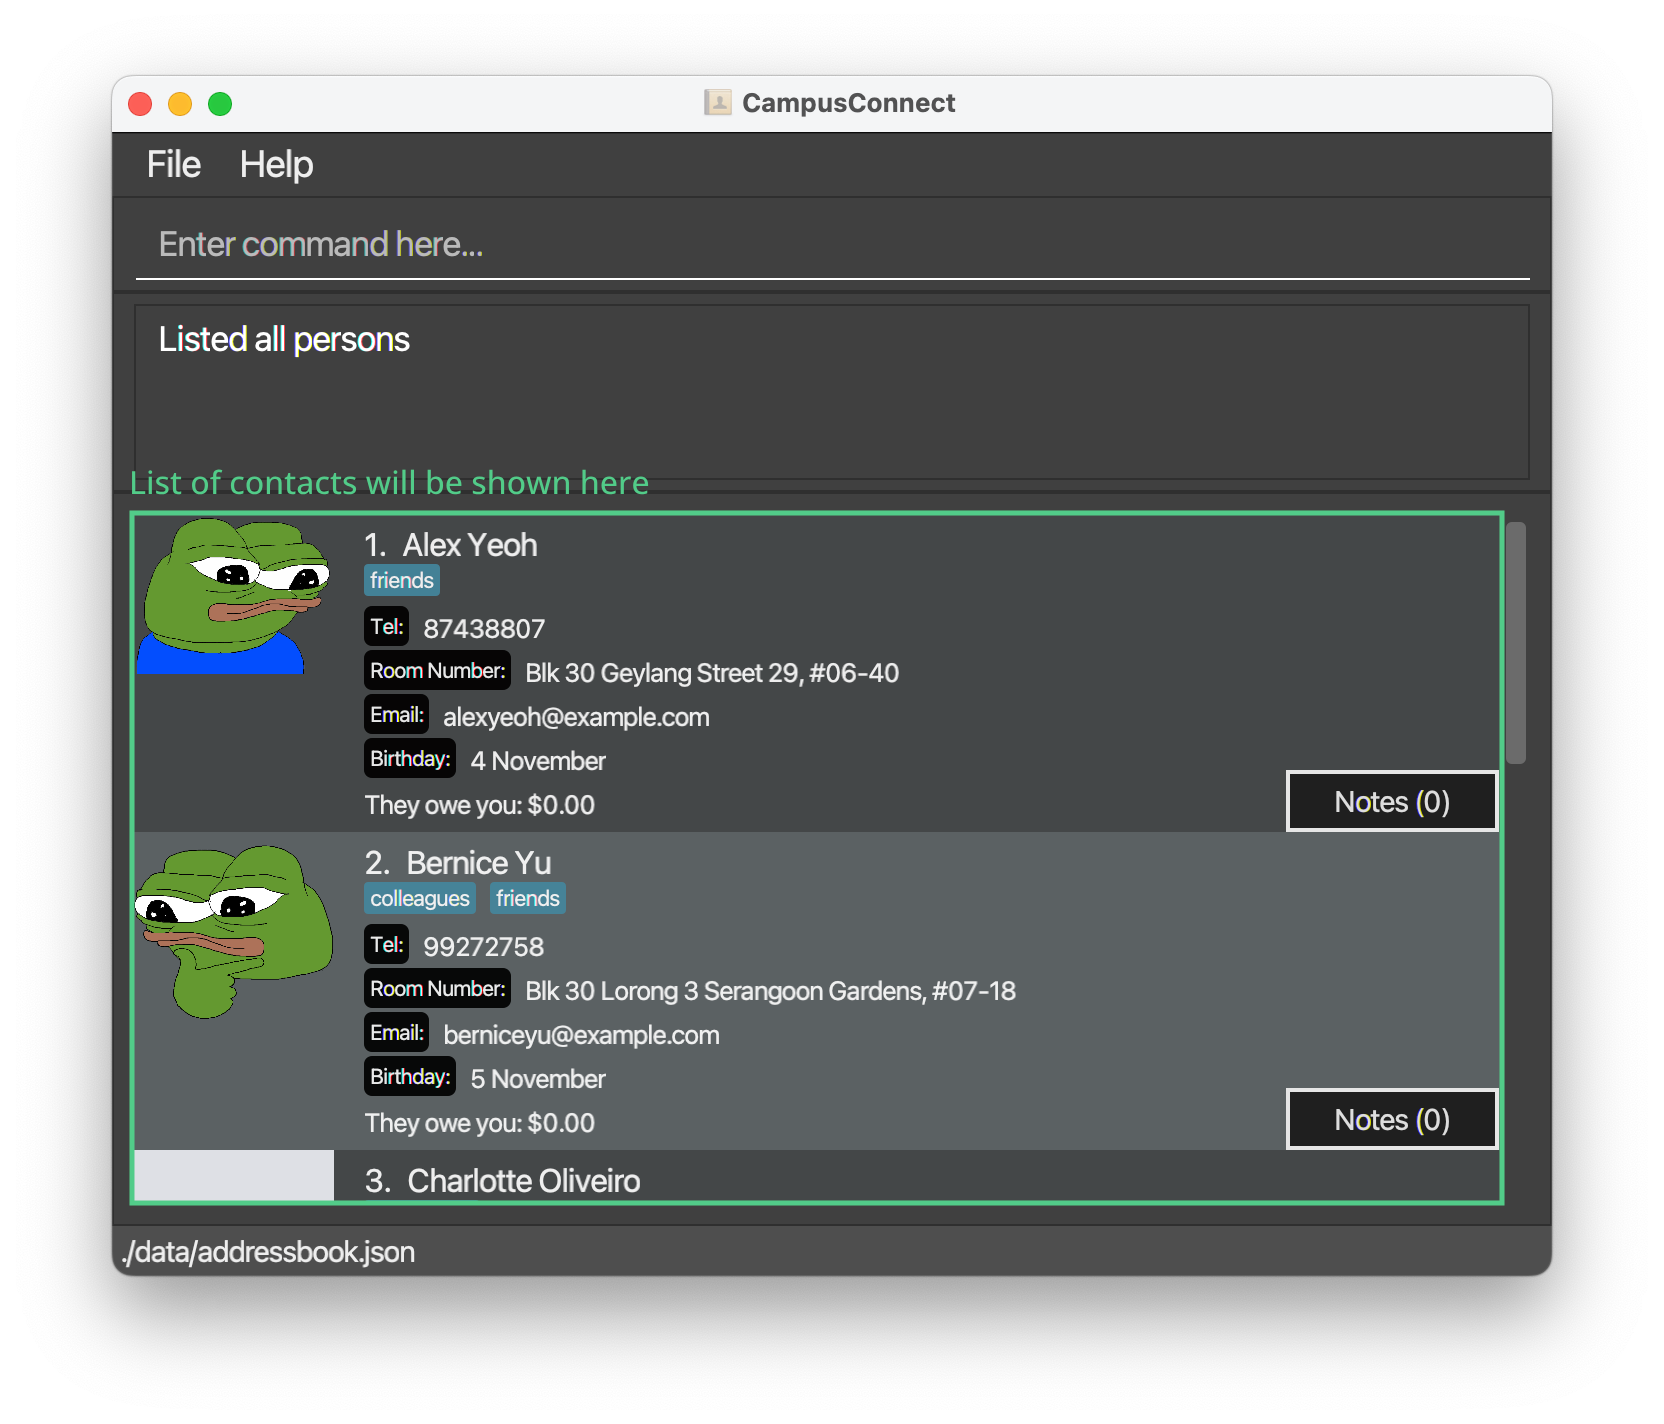
- (a) Command input box
- The Command input box is where you enter commands.
- Type a command according to the formats described in features and press
Enterto execute the command.
- (b) Command output log
- The Command output log will display helpful information when commands execute successfully, or display errors when commands are unsuccessful.
- (c) Contact directory
Features
Notes about the command format:
Words in
UPPER_CASEare the parameters to be supplied by the user.
e.g. Inadd n/NAME,NAMEis a parameter which can be used asadd n/John Doe.Parameters in square brackets are optional, with
addaltandeditas an exception. (Refer to Add alternative information to contact and Edit information of contact under Features)
e.g Inn/NAME [t/TAG],[t/TAG]is an optional parameter which can be used asn/John Doe t/friendor asn/John Doe.Parameters with
… after them can be used multiple times including zero times.
e.g.[t/TAG]…can be used as(i.e. 0 times),t/friend,t/friend t/familyetc.Parameters can be in any order, except for
PERSON_INDEXandNOTE_INDEX.
e.g. If the command specifiesn/NAME p/PHONE_NUMBER,p/PHONE_NUMBER n/NAMEis also acceptable. However, if the command specifiesPERSON_INDEX n/NAME,n/NAME PERSON_INDEXis not acceptable.Extraneous parameters for commands that do not take in parameters (such as
help,list,exitandclear) will be ignored.
e.g. If the command specifieshelp 123, it will be interpreted ashelp.If you are using a PDF version of this document, be careful when copying and pasting commands that span multiple lines as space characters surrounding line-breaks may be omitted when copied over to the application.
Contact Management
Properties of contact
Before you proceed to use the manage contact features of CampusConnect, take a quick read of the table below that provides a summary of the accepted formats for each respective parameters.
Add contact: add
CampusConnect allows you to add contacts of the people you have met on campus. It helps you to store their contact information so that you can keep track of your contacts all in one place.
This feature involves the command: add, which adds basic information of your contact.
Format: add n/NAME p/PHONE_NUMBER e/EMAIL a/ADDRESS [t/TAG]...
Below are some examples on how to use the command:
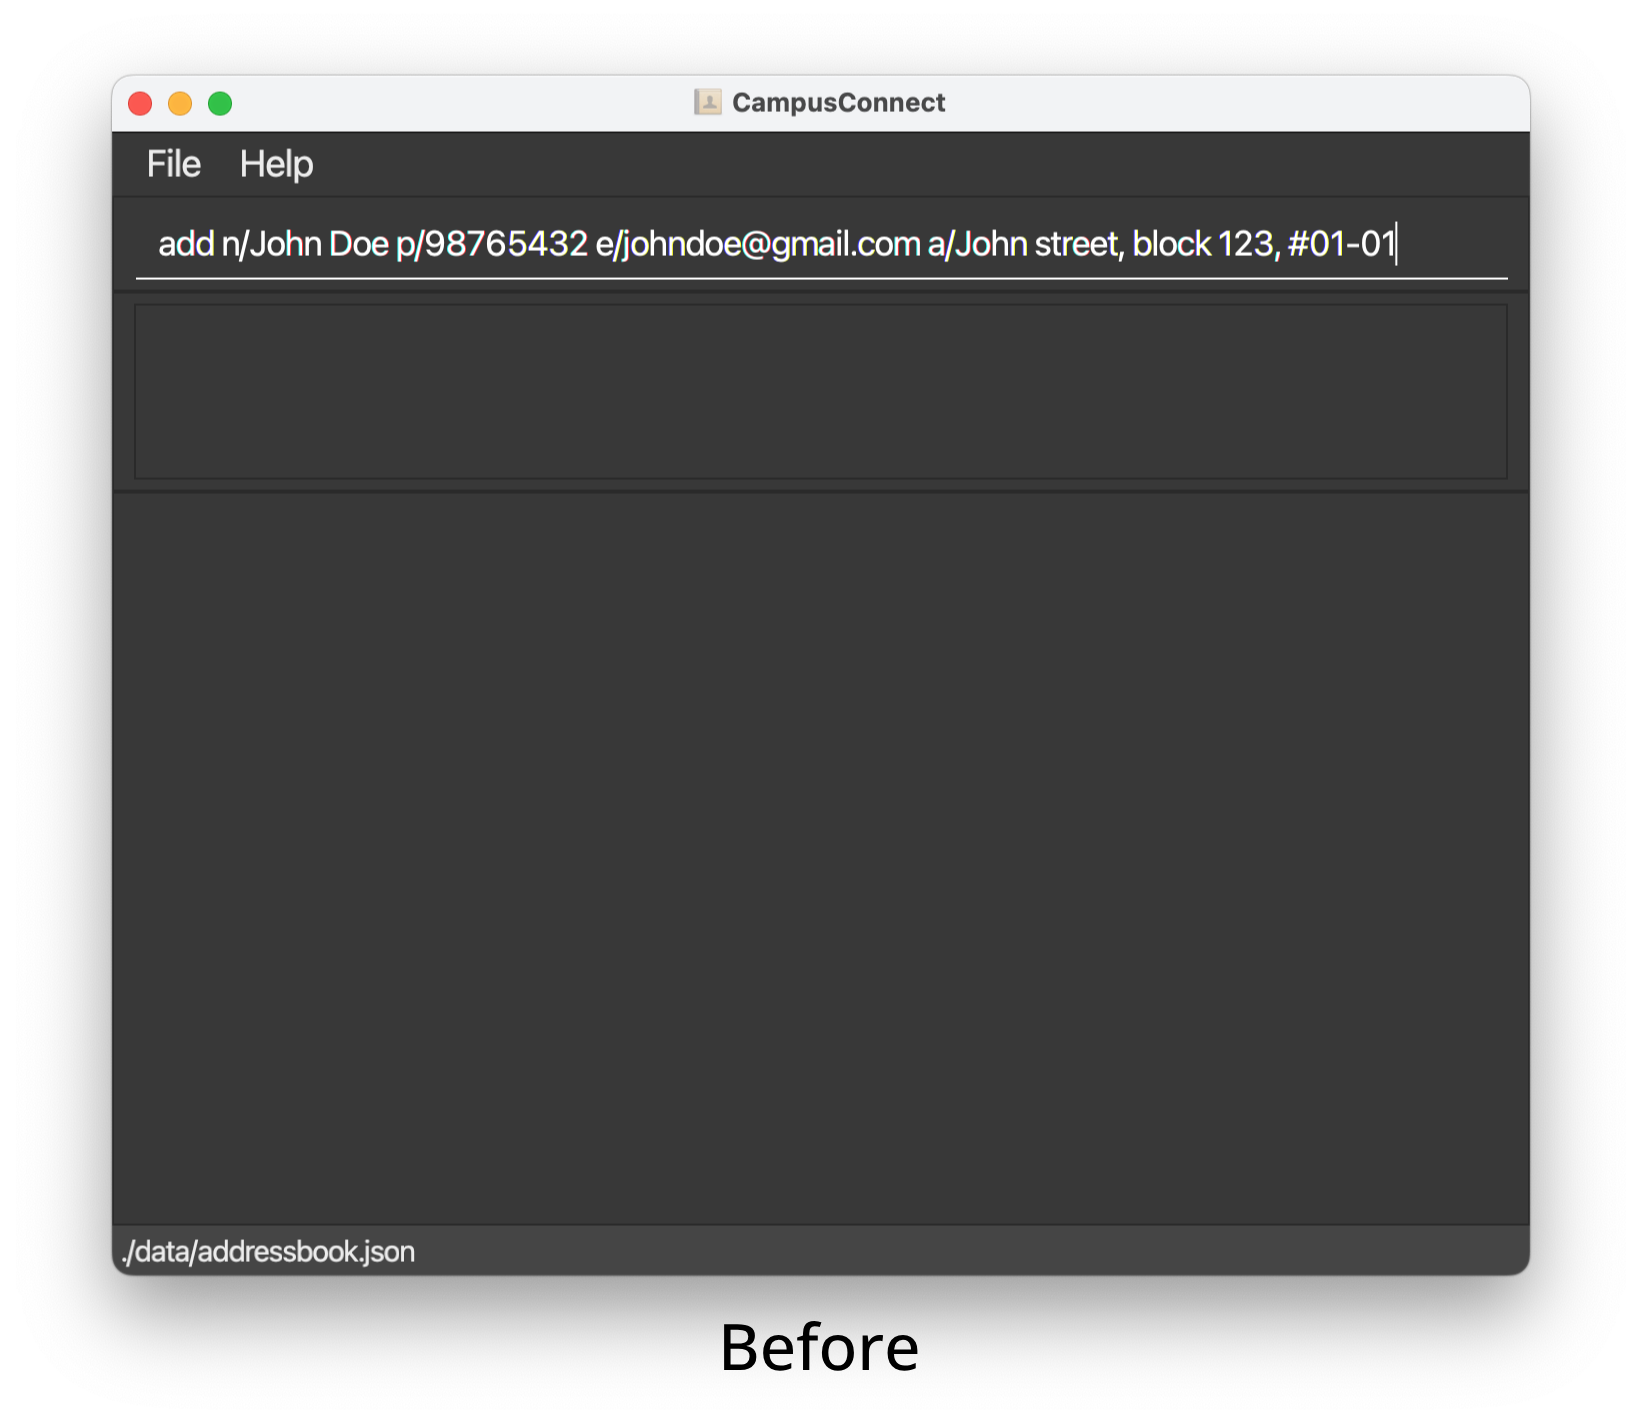
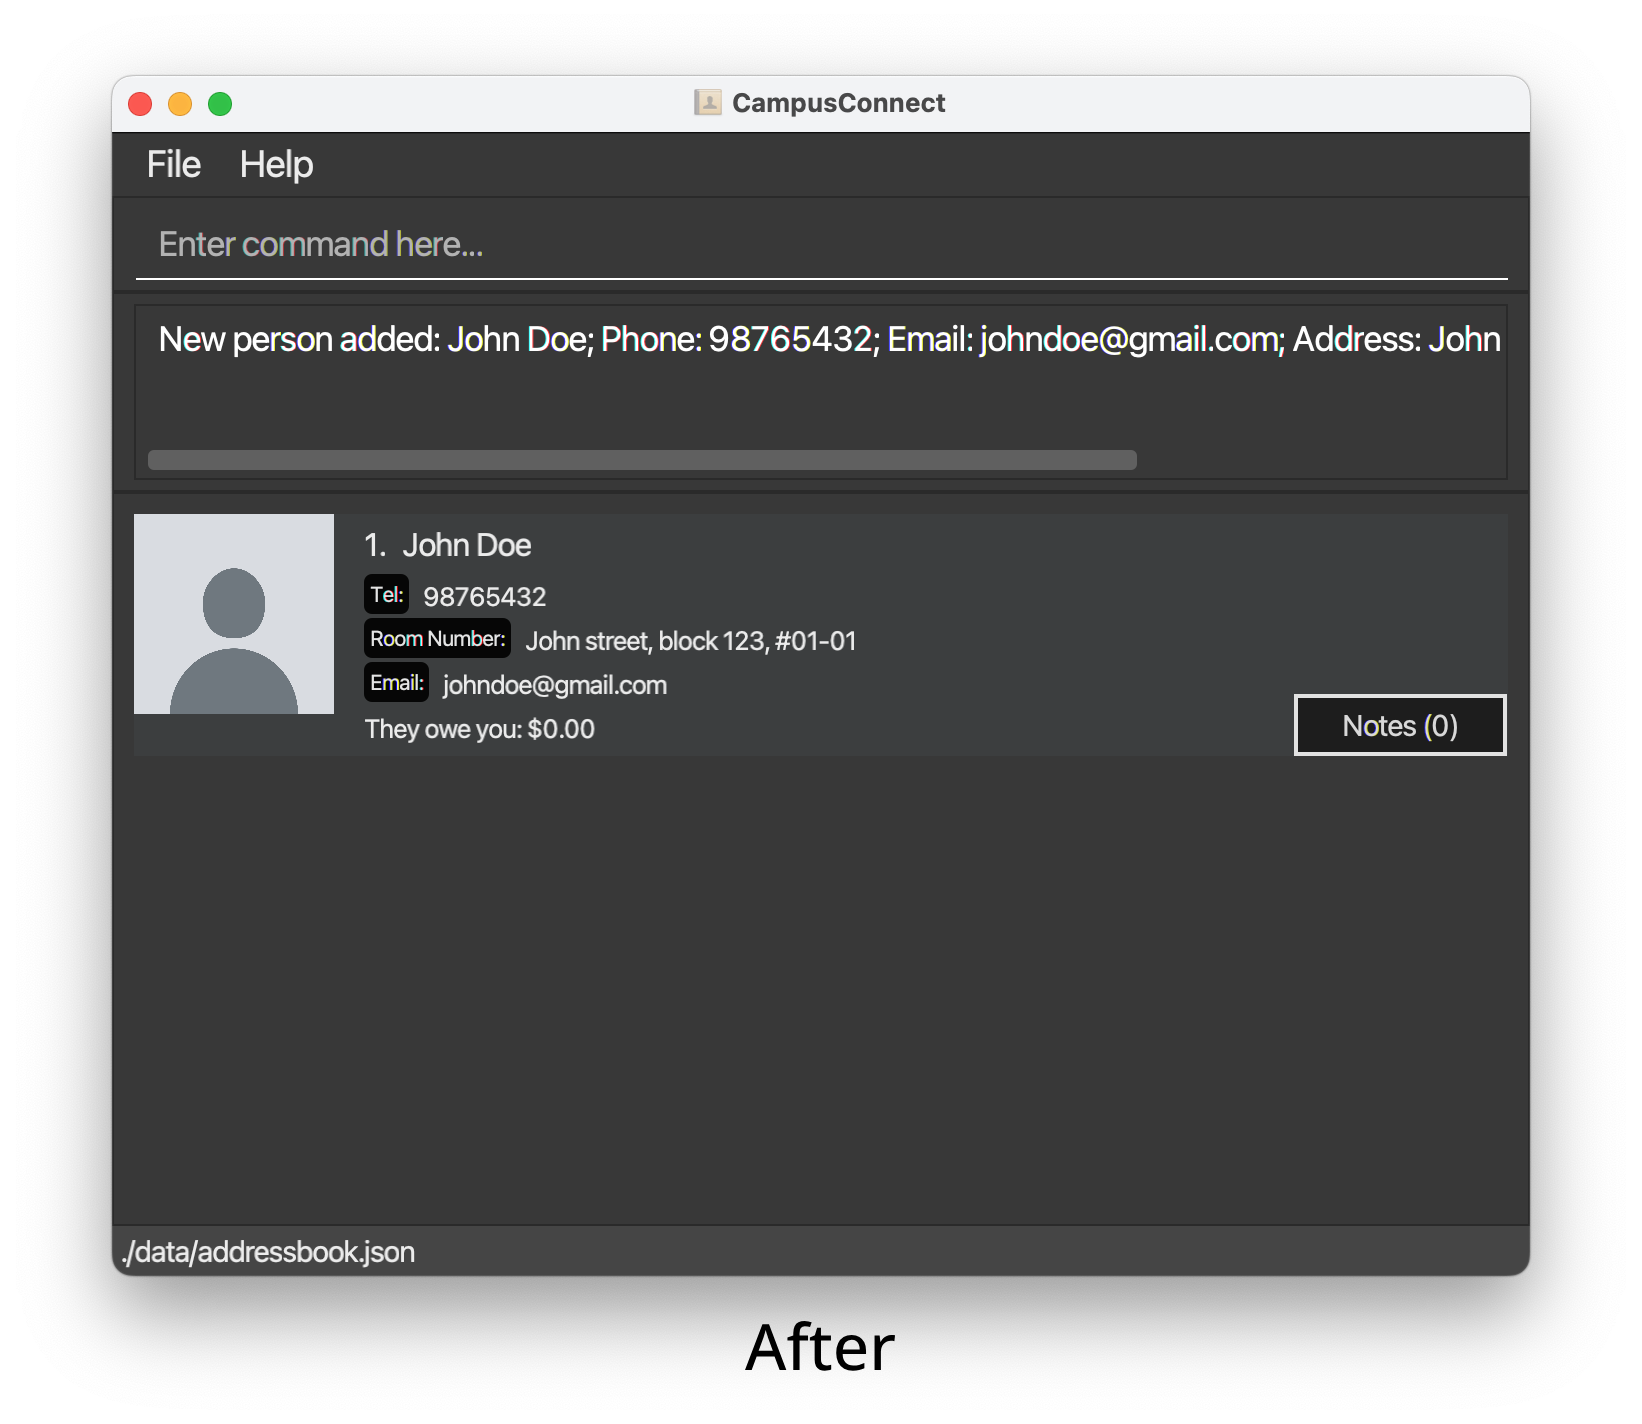
add n/John Doe p/98765432 e/johndoe@gmail.com a/John street, block 123, #01-01: Adds a contact named "John Doe" with the phone "98765432", email "johndoe@gmail.com" and address "John street, block 123, #01-01".add n/Betsy Crowe e/betsycrowe@example.com a/Newgate Prison p/98765431 t/friend: Adds a contact named "Betsy Crowe" with the email "betsycrowe@example.com", address "Newgate Prison", phone "98765431", and a tag "friend".add n/Jane Doe p/98765433 e/janed@example.com a/Jane street, block 123, #01-01 t/floorball t/suitemate: Adds a contact named "Jane Doe" with the phone "98765433", email "janed@example.com", address "Jane street, block 123, #01-01" and two tags "floorball" and "suitemate".
Refer to properties of contact on the accepted formats for the respective parameters.
Here is what CampusConnect looks like when you execute the add command.
If you are adding a new contact with a name (case sensitive) that is already saved in CampusConnect, you will not be able to add the new contact.
Add alternative information to contact: addalt
Besides adding basic information for your contacts, CampusConnect supports the addition of alternative information of your existing contacts in CampusConnect. It helps you to store more contact information so that you can stay better connected to them.
This feature involves the command: addalt, which adds alternative information of your contact.
Format: addalt PERSON_INDEX [tg/TELEGRAM] [e2/SECONDARY_EMAIL] [li/LINKEDIN] [b/BIRTHDAY]
Below are some examples on how to use the command:
addalt 1 tg/@johndoe_123 e2/johndoe@hotmail.com li/john-doe-b9a38128a b/31/10: Adds telegram "@johndoe_123", secondary email "johndoe@hotmail.com", linkedin "john-doe-b9a38128a" and birthday "31/10" for contact at index 1 of your contact list.addalt 2 e2/besty@hotmail.com tg/@betsycrowe li/besty-crowe-b7a15138b b/24/07: Adds secondary email "besty@hotmail.com", telegram "@bestycrowe", linkedin "besty-crowe-b7a15138b" and birthday "24/07" for contact at index 2 of your contact list.addalt 3 tg/@janedoe_123: Adds telegram "@janedoe_123" for contact at index 3 of your contact list.
Refer to properties of contact on the accepted formats for the respective parameters.
- You should provide a positive integer that is smaller than or equal to the number of contacts currently displayed in CampusConnect for
PERSON_INDEX. - You should provide at least one of the parameters, i.e.,
[tg/TELEGRAM],[e2/SECONDARY_EMAIL],[li/LINKEDIN], or[b/BIRTHDAY]for the command to work.
Edit information of contact: edit
If the details of your contacts have changed, CampusConnect enables you to edit your contacts with the latest updated information so that you can still continue to keep in touch with them! Moreover, if you have made a mistake earlier while adding your contact information, CampusConnect empowers you to correct your mistakes through the edit command!
This feature involves the command: edit, which edits existing information saved to your contact.
Format: edit PERSON_INDEX [n/NAME] [p/PHONE_NUMBER] [e/EMAIL] [a/ADDRESS] [t/TAG]... [tg/TELEGRAM] [e2/SECONDARY_EMAIL] [li/LINKEDIN] [b/BIRTHDAY]
Below are some examples on how to use the command:
edit 1 tg/@johndoe e2/johndoe@gmail.com: Edits telegram to "@johndoe" and secondary email to "johndoe@gmail.com" for contact at index 1 of your contact list.edit 2 n/Betsy e/betsy@example.com a/Newgate Heavan p/98765411 t/bestfriend: Edits name to "Besty", email to "besty@example.com", address to "Newgate Heavan", phone to "98765411" and tag to "bestfriend" for contact at index 2 of your contact list.edit 3 t/Removes all existing tags for contact at index 3 of your contact list.
Note: In this case, for the[t/TAG]parameter, you can only input it once if you want to remove all existing tags from your contact, e.g.edit 3 t/ t/will not work.
Refer to properties of contact on the accepted formats for the respective parameters.
- You should provide a positive integer that is smaller than or equal to the number of contacts currently displayed in CampusConnect for
PERSON_INDEX. - You should provide at least one of the parameters under properties of contact for the command to work.
- You should not edit any empty alternative information i.e. telegram, secondary email, linkedin, birthday of your contact using this command. Refer to add alternative information to contact to add these information.
- You should not input
NAMEwith a name (case sensitive) that already exists in CampusConnect.
Update photo of contact: updatephoto
If you are afraid that you may forget who the saved contact is in CampusConnect, our application enables you to update the photo of your contact so that you can visually remember and recognize them!
This feature involves the command: updatephoto, which updates the photo of an existing contact.
Format: updatephoto PERSON_INDEX path/NEW_PHOTO_PATH
If you are unsure on how to obtain the NEW_PHOTO_PATH of your photo:
- For Windows users, click here and follow the guide.
- For macOS users, click here and follow the guide.
Below are some examples on how to use the command:
updatephoto 1 path/C:/photos/new_johndoe.jpg: Updates the photo of the contact at index 1 with the specified image (Windows).updatephoto 2 path//Users/john/Pictures/profile.png: Updates the photo of the contact at index 2 with the specified image (macOS).
- You should provide a positive integer that is smaller than or equal to the number of contacts currently displayed in CampusConnect for
PERSON_INDEX. - Filetype of the photo must be either jpg or png
- Photos must not be larger than 5MB
List all contacts: list
After using CampusConnect's contact search feature that filters the contacts you are looking for, you may want to have an overview of all your contacts again! Thus, CampusConnect allows you to list all your contacts.
This feature involves the command: list, which lists all of your saved contacts.
Format: list
Below is an example on how to use the command:
list: Lists all your saved contacts in CampusConnect.
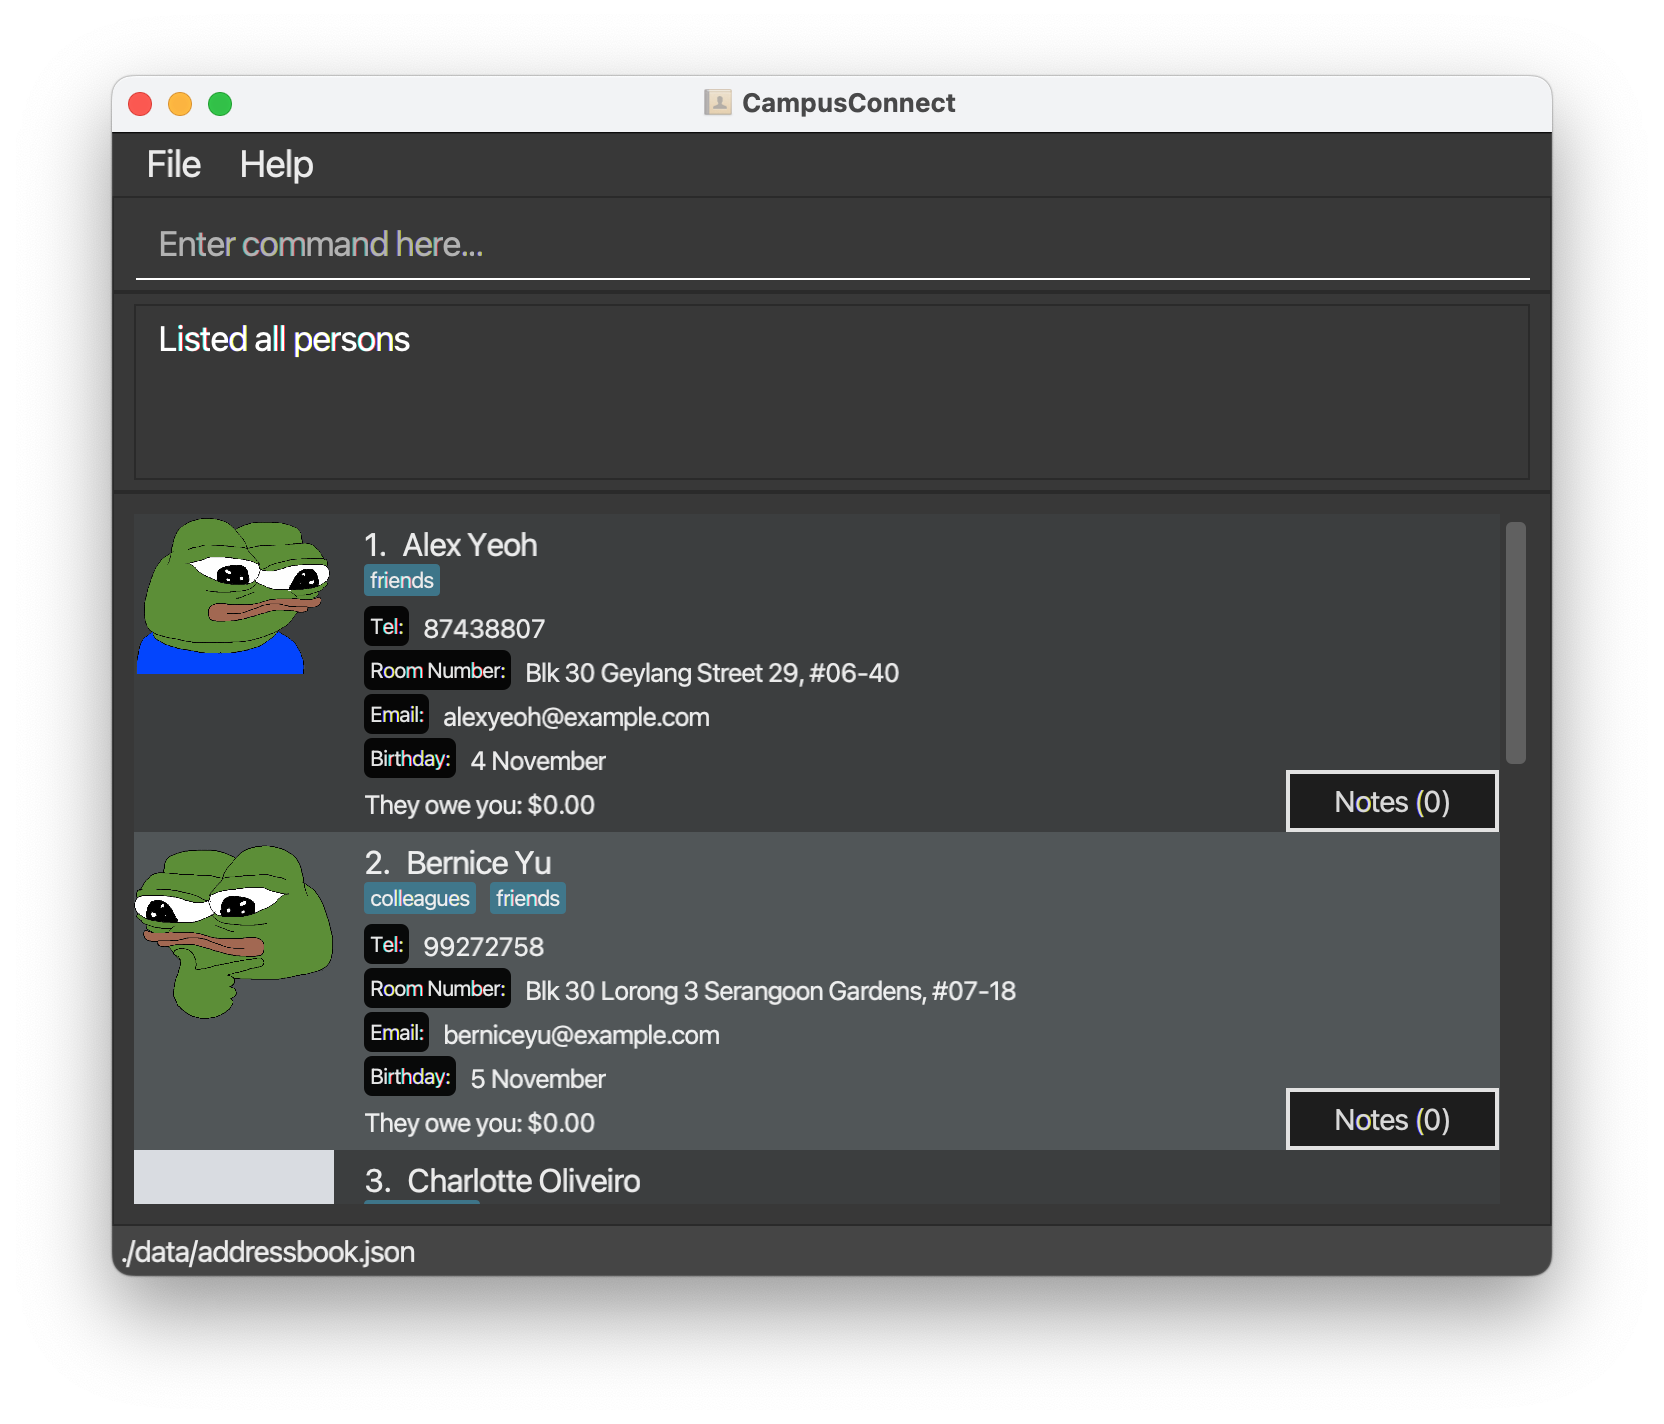
Here is what CampusConnect looks like after you execute the list command.
Delete contact: delete
In the event that you will like to organize your contact list by removing contacts that you no longer need, CampusConnect supports you in deleting your contacts to reduce the clutter you are experiencing.
This feature involves the command: delete, which deletes a specified contact.
Format: delete PERSON_INDEX
Below are some examples on how to use the command:
delete 1: Deletes contact at index 1 of your contact list.delete 2: Deletes contact at index 2 of your contact list.
You should provide a positive integer that is smaller than or equal to the number of contacts currently displayed in CampusConnect for PERSON_INDEX.
Notes
The notes feature allows you to add and remove notes for a person, and provides a convenient pop-up window to view all notes for a person. You can add notes to a person with the addnote command, remove notes with the removenote command, and view notes by using either the viewnotes command or by clicking the Notes button in the person's information window.
The parameters for these commands are PERSON_INDEX, NOTE_INDEX and NOTE_CONTENT. These parameters are explained in detail in the section below.
Add note to contact: addnote
You can add notes to a person with the addnote command.
Format: addnote PERSON_INDEX NOTE_CONTENT
addnote 1 This is a sample note for the person.: Adds a note to the contact at index 1.addnote 2 This is another sample note.: Adds a note to the contact at index 2.
Remove note from contact: removenote
You can remove notes from a person with the removenote command.
Format: removenote PERSON_INDEX NOTE_INDEX
removenote 1 2: Removes the second note from the contact at index 1.removenote 1 1: Removes the first note from the contact at index 1.
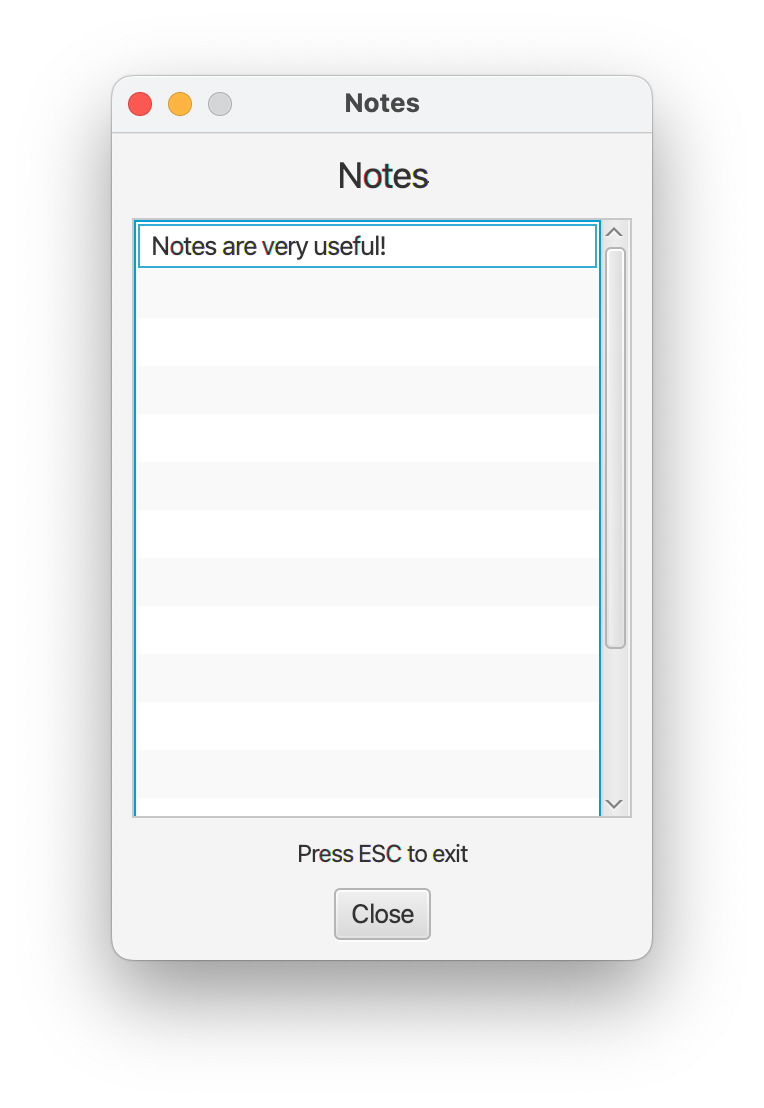
View notes of contact: viewnotes
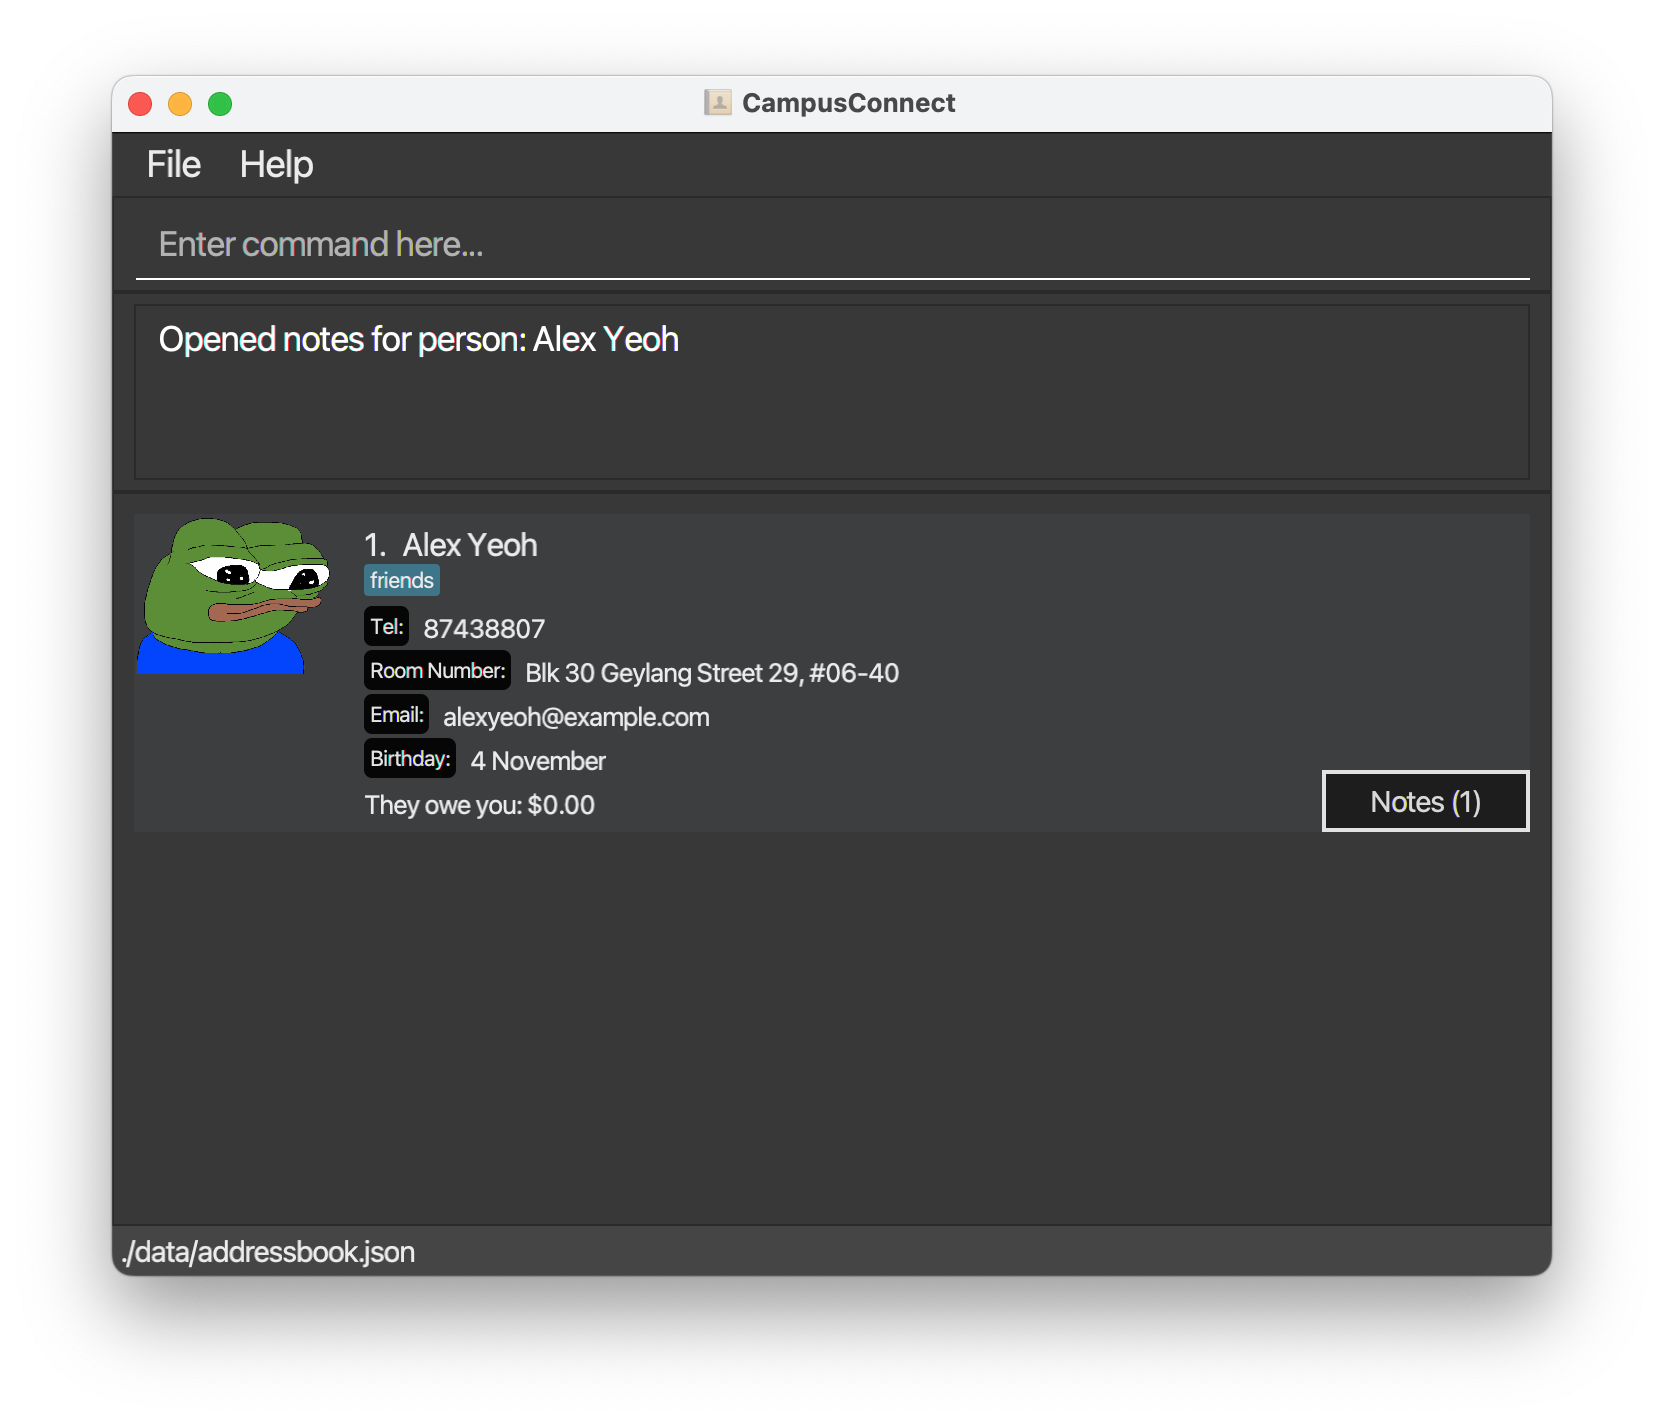
You can view notes by one of two ways: by using the viewnotes command, or by clicking on the Notes button in the person's information window. The notes window can be closed by either clicking the Close button or by pressing the ESC key, making it convenient for both CLI and GUI users to use the notes feature.
Format: viewnotes PERSON_INDEX
viewnotes 1: Shows all notes for the contact at index 1.viewnotes 2: Shows all notes for the contact at index 2.
The notes window will automatically update when you add or remove notes, so you can keep it open and see your changes. You may also open multiple notes windows at once, for the same or different contacts.
Notifications
For our forgetful users, CampusConnect provides a useful Notification System! Upon opening the app, the notification system will prompt you about any upcoming notable events.
At the moment, only birthday notifications are supported. More notification types will be supported in future releases of CampusConnect.
Birthday notifications
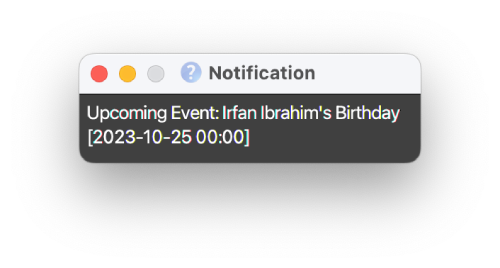
To ensure that you never forget to wish happy birthday to your friends, CampusConnect has an in-built birthday notification system. Every time you open CampusConnect, a pop-up notification will appear for contacts whose birthdays are within one day.
Here is what a sample birthday notification will look like when you open your CampusConnect app.
Payments
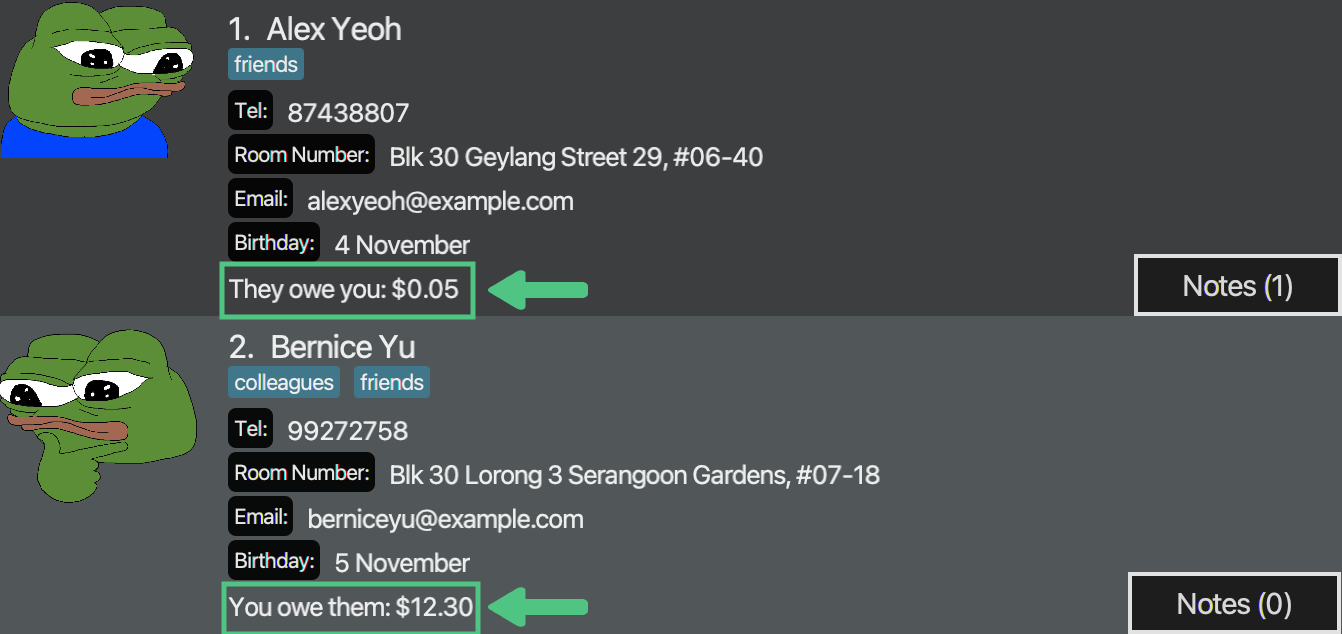
CampusConnect allows you to keep track of payments between you and your contacts! Each contact has a balance, which is the amount of money that you owe them (or that they owe you). This balance is positive if they owe you money, and negative if you owe them money.
Every time you record a payment to or from a contact, their balance will be updated accordingly so that you can settle your debts easily. Instead of displaying positive or negative balances, balances are reflected directly in the contact list with easily-understandable human-readable explanations, like so:
That said, CampusConnect's Payments feature should be only used for casual transactions among friends, and is not for commercial or business use.
We enforce this with a strict payment tracking limit of a maximum of $10,000 owed to or from each contact. If you attempt to record a payment that would cause a contact's balance to exceed this limit, you will see an error message stating that the payment cannot be recorded for this reason.
Money Amount Format
As part of our payments feature, CampusConnect reads in money amounts from the user.
You should note that the money amount format is strictly enforced. This is to ensure that the money amounts are entered correctly, and to prevent any errors that may arise from incorrect money formats.
An accepted money amount format follows these three rules:
- It must be a positive number.
- It must be in dollars and cents, or just dollars.
- It must have at most 2 decimal places (we do not support precisions lower than cents).
Additionally, remember that CampusConnect enforces a strict payment tracking limit.
We also provide some convenience features for you to enter money amounts more easily, for cases where you may be copying and pasting money amounts from other sources. These convenience features are as follows:
- You may enter money amounts with a dollar sign (
$) prefix. - You may enter money amounts with trailing zeroes.
Each format rule in action:
- Rule 1:
10is a valid money amount, but-10is not. - Rule 2:
10.05,10.5,10,0.5,0.05are all valid money amounts, but.50is not. - Rule 3:
10.55is a valid money amount, but10.555is not.
Convenience features in action:
$10is a valid money amount, and is equivalent to10.010is a valid money amount, and is equivalent to10.00000000005.55is also a valid money amount, and is equivalent to5.55.
Now that you understand how to enter money when using our app, you can proceed to learn how to record payments in CampusConnect!
Pay money to contact: pay
Records a payment from you to a contact. The amount the contact owes you increases by that amount after this transaction.
Format: pay PERSON_INDEX AMOUNT
PERSON_INDEXis the index of the contact in the contact list.AMOUNTis the amount of money you pay the contact, written in valid money format.
Examples:
Suppose you have a contact at index 1 that owes you $10. Then:
pay 1 10records a payment of$10from you to the contact at index1.pay 1 $0.5records a payment of$0.50from you to the contact at index1.
At the end of both commands, the contact owes you $20.50.
pay 1 -3does NOT record any payment. Recall that money amounts must follow CampusConnect's money format, which does not accept negative amounts.
If you're looking to record a payment from a contact to you, read ahead on how you can use the owe command instead!
Owe money to contact: owe
Records a payment from a contact to you. The amount you owe the contact increases by that amount after this transaction.
Format: owe PERSON_INDEX AMOUNT
PERSON_INDEXis the index of the contact in the contact list.AMOUNTis the amount of money you owe the contact, written in valid money amount format.
Examples:
Suppose you have a contact at index 1 that owes you $10. Then:
owe 1 9records a payment of$9from the contact at index1to you.
At the end of the command, the contact owes you $1.
owe 1 $2.5records a payment of$2.50from the contact at index1to you.
At the end of both commands, you owe the contact $1.50.
owe 1 $50000does NOT record any payment. Recall that CampusConnect enforces a strict payment tracking limit.
Contact Search
Another feature of CampusConnect is the ability to search for contacts based on a variety of criteria. This is useful for quickly finding contacts whose details you may only partially remember, or for finding contacts who match a certain criteria.
This feature involves only 1 command: find, which list contacts whose fields match the specified find expression.
Format: find FIND_EXPRESSION
The contact list will be filtered until you perform another find command or use the list command.
This includes commands that add, delete, or edit contacts — newly-added more edited contacts will be shown only if they match the criteria.
Find expressions have a low barrier to entry that allows for simple filtering by field. This basic filtering for contacts is likely sufficient for most of your use cases. We recommend that you first read the basic filtering section to learn how to perform simple filtering by a single field.
If you then find that the basic filtering is insufficient for your use case, you can read the advanced filtering section to learn how to perform more complex filtering.
Note that in all cases, the search is case-insensitive for alphabetic characters. For example, n/Joe will match contacts who have the name Joe, joE, Ajoeia, BobJOe Lee, etc., and t/friend will match friend, FriENd, FRIEND, etc.
Basic Filtering
Contacts can be filtered by a single field by typing:
- the prefix of the field you're searching through, followed by
- a slash (
/), followed by - the keyword you're looking for.
Such a search will return all contacts whose field matches the keyword based on the behavior specified in the supported fields table.
We call this basic block of filtering a find condition, which is the smallest unit that act as a valid FIND_EXPRESSION.
By default, keywords can contain alphanumeric characters, alongside @, $, #, _, -, ,, and ..
However, if you surround the keyword in double-quote characters ("), you may also include (, ), !, &, |, and spaces () in the keyword.
This is especially useful for searching through fields that frequently contain spaces and special characters, such as addresses.
For now, there is no way to search for the double-quote character (") itself.
This functionality will be added in a future release.
For example, given the following contacts (some fields omitted for brevity):
| Name | Tags |
|---|---|
| John Doe | neighbor, colleague |
| Jane Doe | neighbor, friend |
| Alex Yeoh | friend |
| Yervis Alexis | girlfriend |
n/do is a find condition that will return all contacts whose names contain the substring "do", in this case "John Doe" and "Jane Doe".
Similarly, t/friend is a find condition that will return all contacts who have the "friend" tag, in this case "Jane Doe" and "Alex Yeoh" (and not "Yervis Alexis", since supported fields table requires an exact tag match).
Since n/do and t/friend are both find conditions, they can constitute a FIND_EXPRESSION. The complete commands in each case would be:
find n/dofind t/friend
Additionally, using the double-quote characters, valid find conditions include:
a/"John street, block 123, #01-01"n/"Xiao Ming"
Advanced Filtering
While basic filtering is sufficient for most use cases, you may find that you need to perform more complex filtering. For example, you may want to find all contacts who have the tag "friend" and whose names contain the substring "do". Or you may want to find all contacts whose addresses contain the substring "street" or whose names do not contain the substring "ye".
You can accomplish this and more using our powerful advanced filtering syntax, which supports arbitrarily-complex FIND_EXPRESSION, which can be composed of many find conditions combined or transformed by logical operators.
Note that the smallest possible find expressions is simply a find condition.
Find expressions can be nested arbitrarily deeply, and that parentheses can be used to group find expressions together to specify the order of evaluation.
For example, given the following contacts (some fields omitted for brevity):
| Name | Tags |
|---|---|
| John Doe | neighbor, colleague |
| Jane Doe | neighbor, friend |
| Alex Yeoh | friend |
| Yervis Alexis | girlfriend |
The following are valid FIND_EXPRESSIONs:
!n/dowill return all contacts whose names do not contain the substring"do", in this case"Alex Yeoh"and"Yervis Alexis"n/do && t/friendwill return all contacts whose names contain the substring"do"and who have the"friend"tag, in this case"Jane Doe".n/do || t/friendwill return all contacts whose names contain the substring"do"or who have the"friend"tag, in this case"John Doe","Jane Doe", and"Alex Yeoh".n/do && (t/friend || t/colleague)will return all contacts whose names contain the substring"do"and who have either the"friend"or"colleague"tag, in this case"John Doe","Jane Doe", and"Alex Yeoh".
Note that the last example is not equivalent to n/do && t/friend || t/colleague. Due to the higher precedence of && compared to ||, this will return all contacts whose names contain the substring "do" and who have the "friend" tag, or who have the "colleague" tag, in this case "Jane Doe" and "Alex Yeoh".
FAQ
Q: How do I transfer my data to another Computer?
A: Install the app in the other computer and overwrite the empty data file it creates with the file that contains the data of your previous CampusConnect home folder.
Q: Why can't I type in characters that aren't printable ASCII characters?
A: Currently, we only support printable ASCII characters. We plan to support Unicode characters in the future for greater internationalization support.
Command summary
| Action | Format, Examples |
|---|---|
| add | add n/NAME p/PHONE_NUMBER e/EMAIL a/ADDRESS [t/TAG]… e.g., add n/John Doe p/98765432 e/johndoe@gmail.com a/John street, block 123, #01-01 |
| addalt | addalt PERSON_INDEX [tg/TELEGRAM] [e2/SECONDARY_EMAIL] [li/LINKEDIN] e.g., addalt 1 tg/@johndoe_123 e2/johndoe@hotmail.com li/john-doe-b9a38128a b/31/10 |
| edit | edit PERSON_INDEX [n/NAME] [p/PHONE_NUMBER] [e/EMAIL] [a/ADDRESS] [t/TAG] [tg/TELEGRAM] [e2/SECONDARY_EMAIL] [li/LINKEDIN] [b/BIRTHDAY] e.g., edit 1 tg/@johndoe e2/johndoe@gmail.com |
| updatephoto | updatephoto INDEX path/NEW_PHOTO_PATH e.g., updatephoto 1 path/C:/photos/new_johndoe.jpg |
| delete | delete PERSON_INDEX e.g., delete 1 |
| list | list e.g., list |
| addnote | addnote PERSON_INDEX NOTE_CONTENT e.g., addnote 1 This is a sample note for the person. |
| removenote | removenote PERSON_INDEX NOTE_INDEX e.g., removenote 1 2 |
| viewnotes | viewnotes PERSON_INDEX e.g., viewnotes 1 |
| pay | pay PERSON_INDEX AMOUNT e.g., pay 1 10 |
| owe | owe PERSON_INDEX AMOUNT e.g., owe 1 9 |
| find | find FIND_EXPRESSION e.g., find n/do |